When it comes to quilting, I’ve managed to use the right angles of squares and rectangles in various layouts to make many quilts. I’ve wanted to move outside my comfort zone to sewing more challenging shapes. On my bucket list are triangles, hexagons, diamonds, and curves.
At this year’s quilting retreat, I decided to use a half-hexagon cutting template to create a wall hanging. I’d had an assortment of bee-themed fabrics and some lovely yellow and grey prints. A bee theme seemed appropriate for a hexagon honeycomb pattern. For this article, I’m sharing an overview of the process from designing the pattern to finishing the quilt, but this is not a step-by-step how-to.

To begin, I needed a pattern. I knew a specific place in my home where I could hang this quilt. It was a long, narrow space, so the available wall dimensions shaped the parameters of my pattern. I decided to place the hexagons in the middle with two outer borders. Using graph paper, I determined the sizes of the pieces I needed to cut.
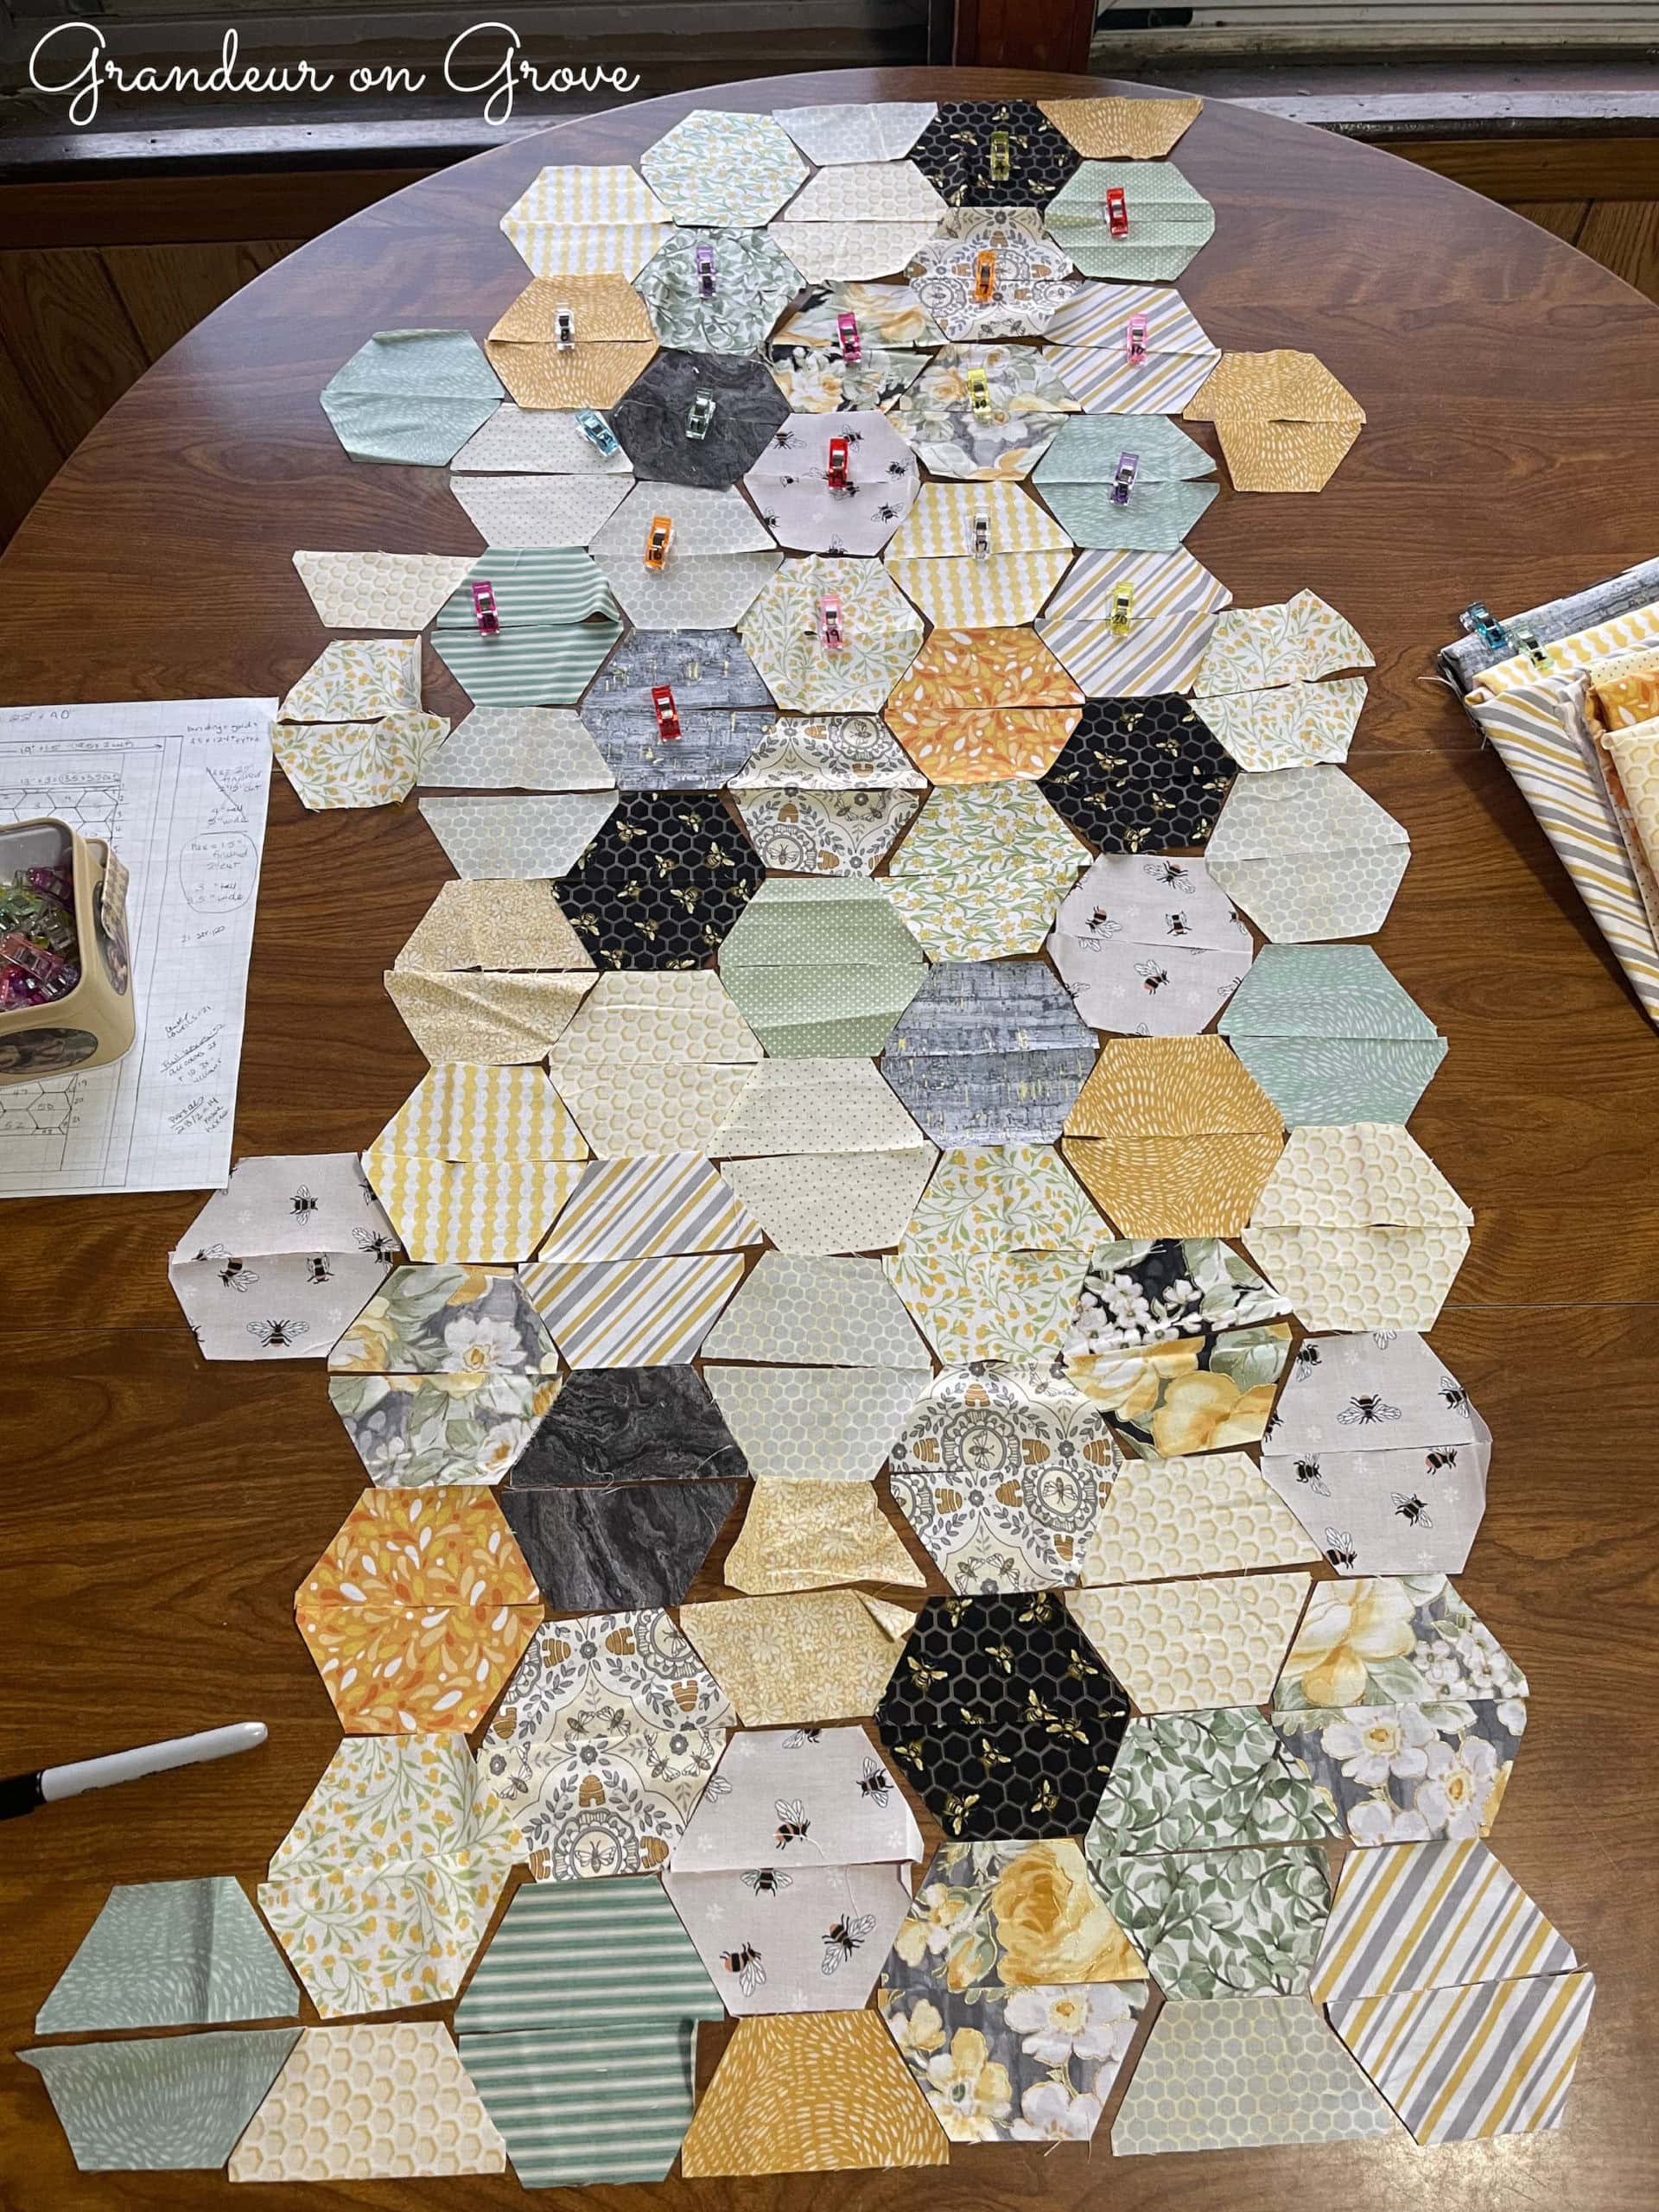
Next, having cut out the half-hexagon pieces, I arranged them on the table to determine the layout of the different fabrics. Because the hexagon pieces are halved, you sew the halves together as strips before connecting them as full hexagons. To do this, I stacked the pieces and clipped them together in numbered rows to keep track of their position, as seen below.
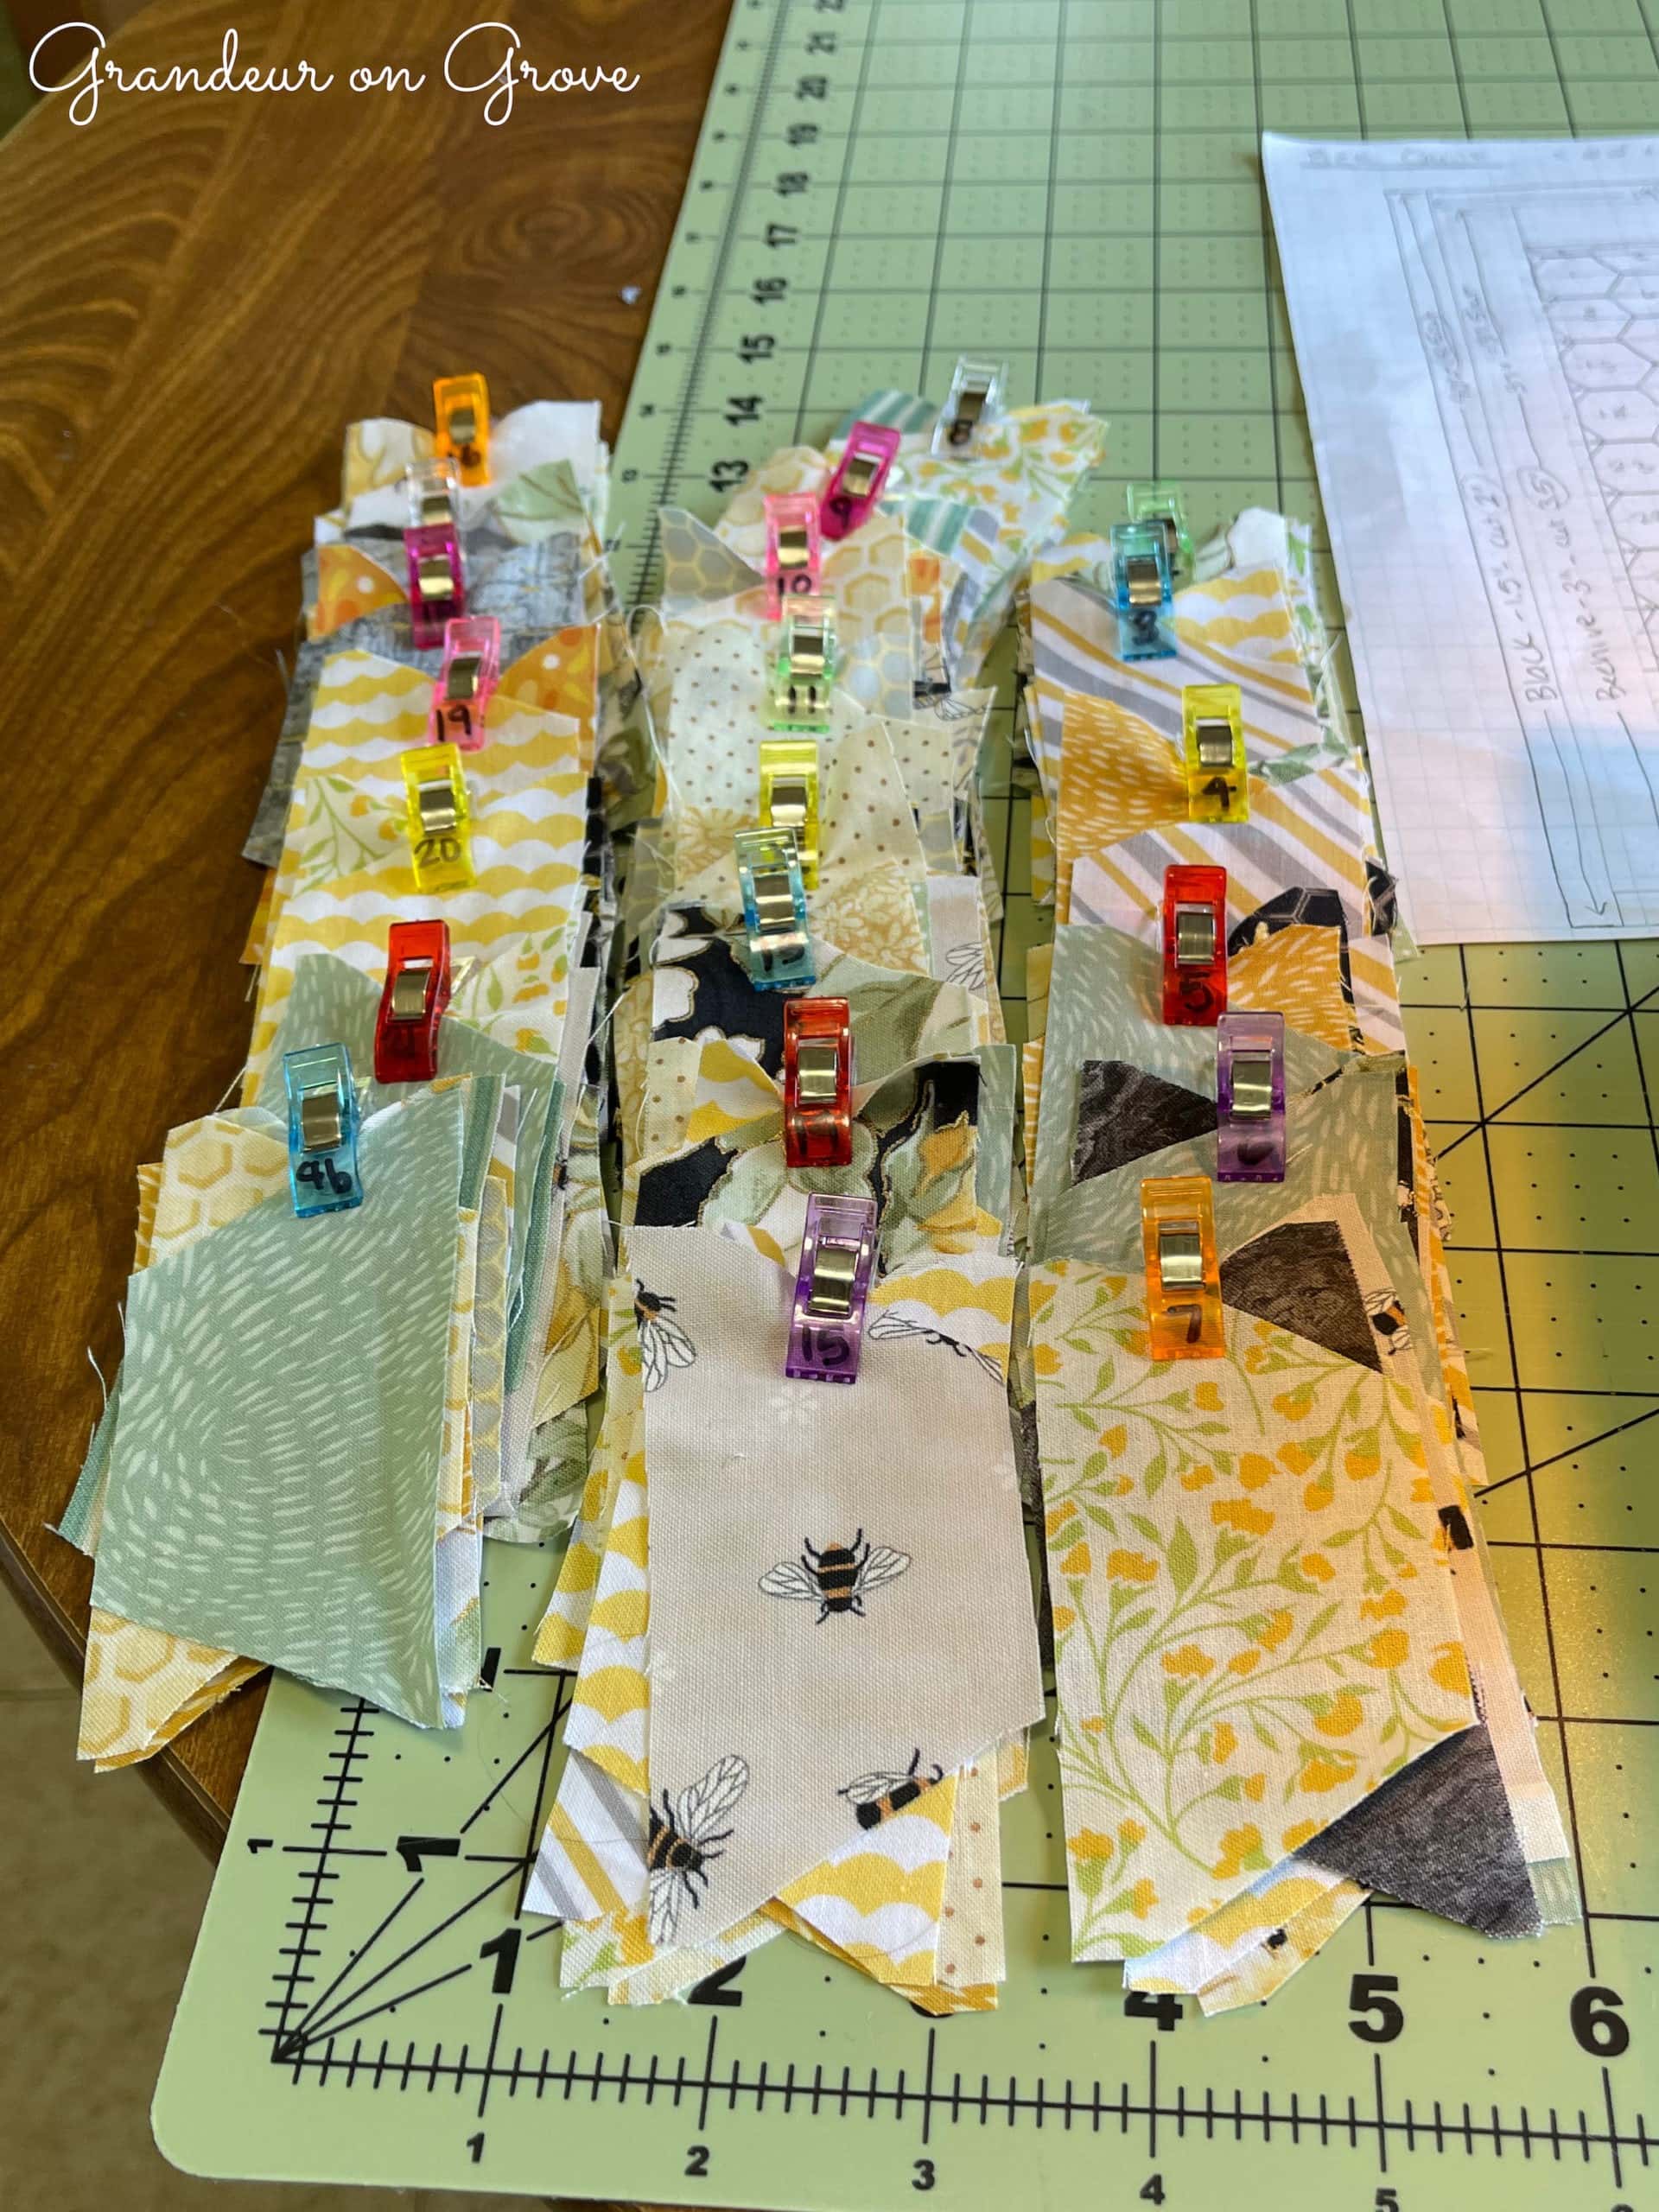
Then, it was time for the tricky part, the part that made this a new challenge. With squares and rectangles, you line up the edges of the two fabrics on top of each other or at right angles to sew them together. The edges needed to overlap with the hexagons, but the two pieces needed to be slightly offset from each other. It took practice and a little finesse to figure out how much each piece should overlap to create a correctly placed seam that resulted in a straight row.
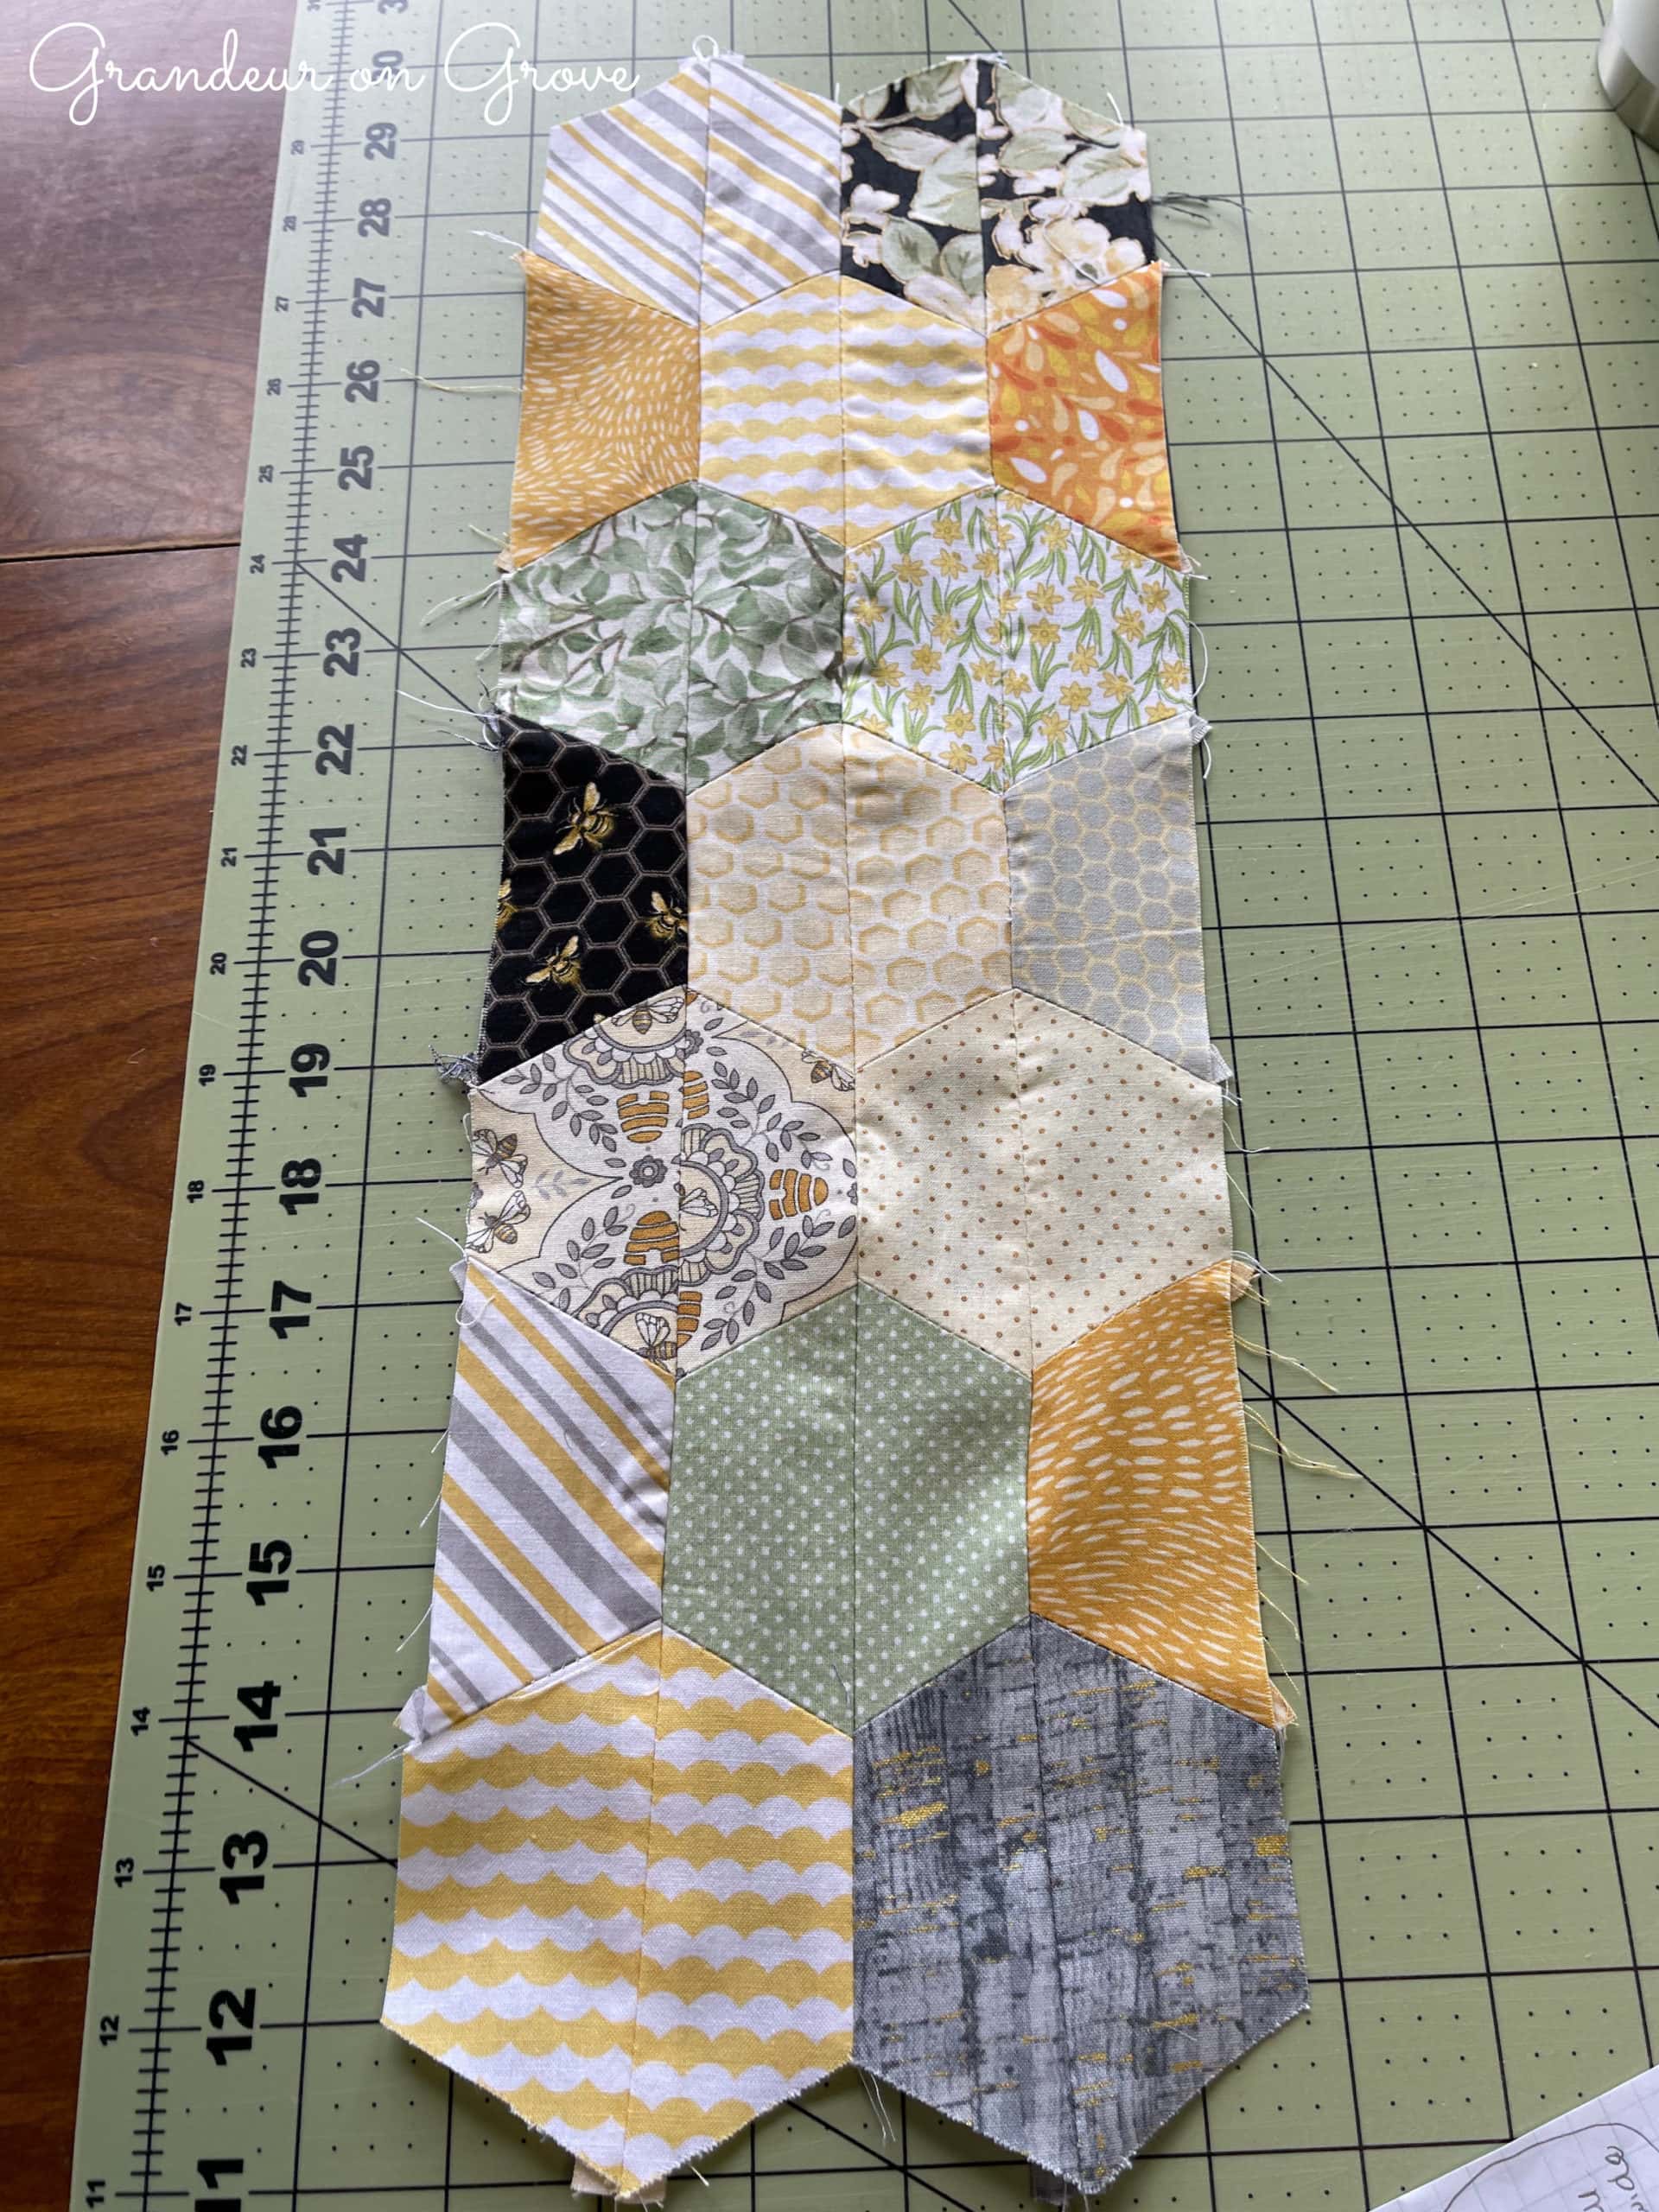
Above, you can see a few rows sewn together. It is crucial to have the seams line up to make a clean hexagon shape when sewing one row to another, like in all quilting. Once I sewed all the hexagons together, I had what you see in the picture below.

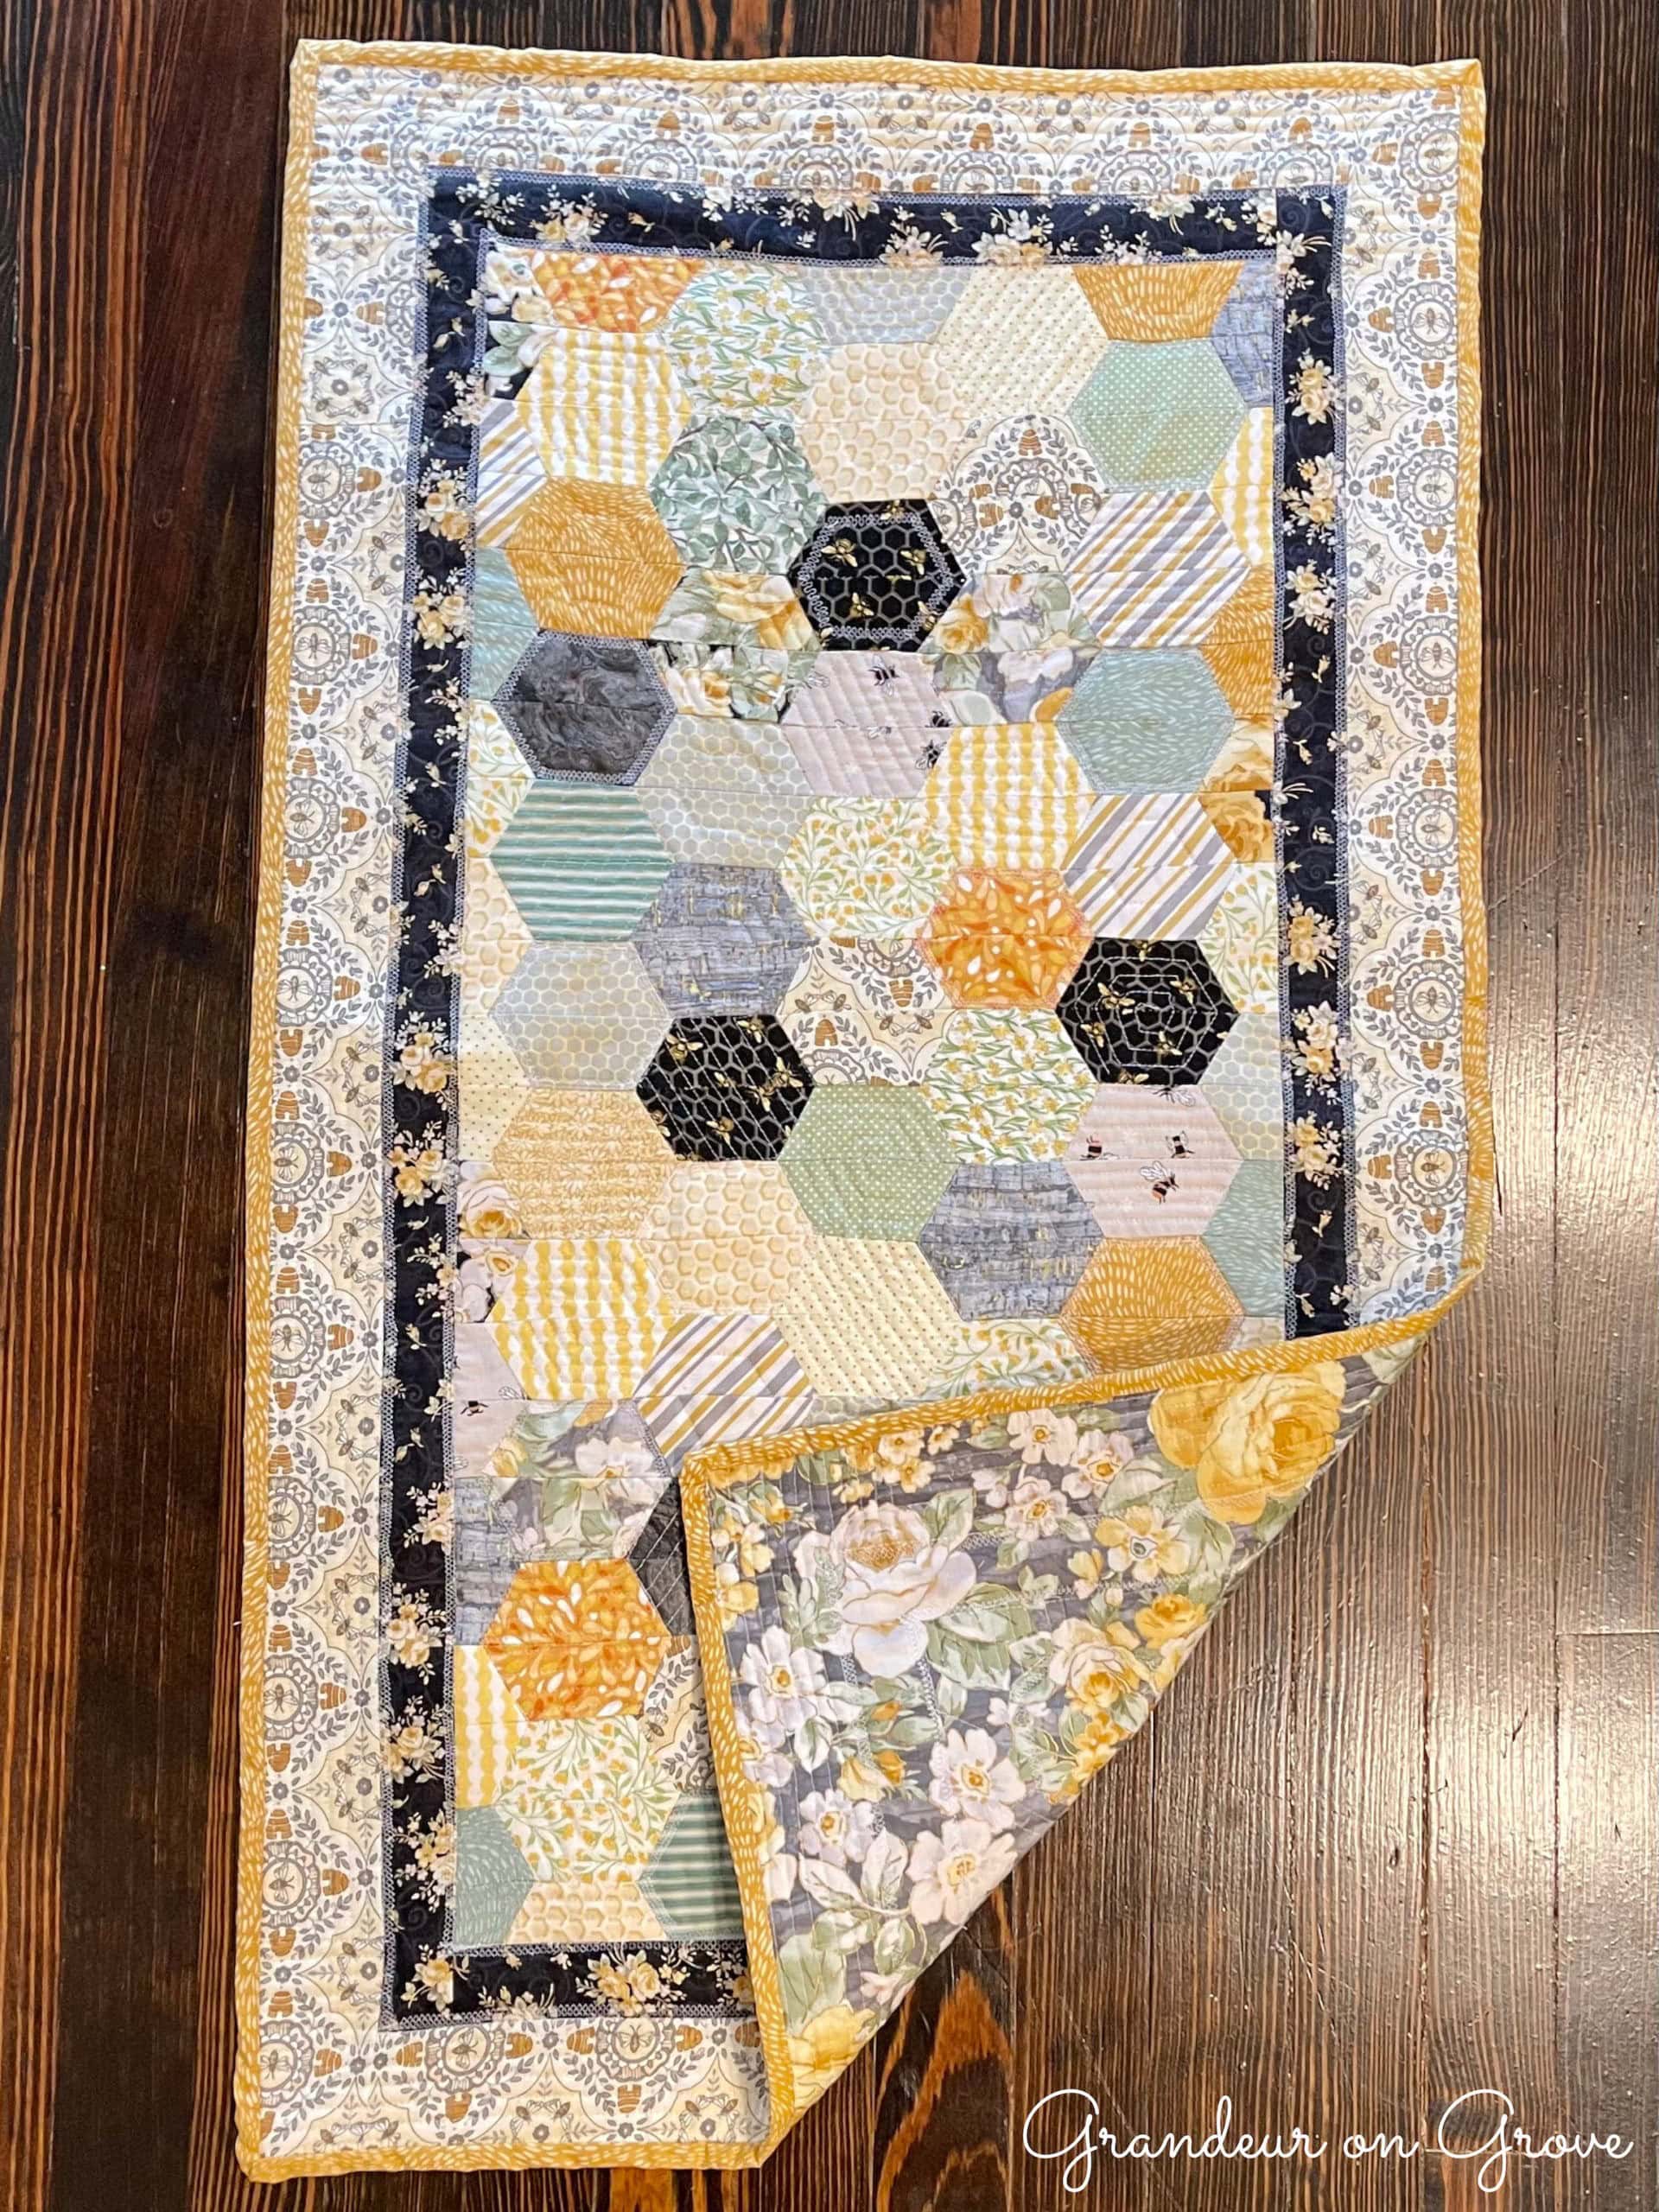
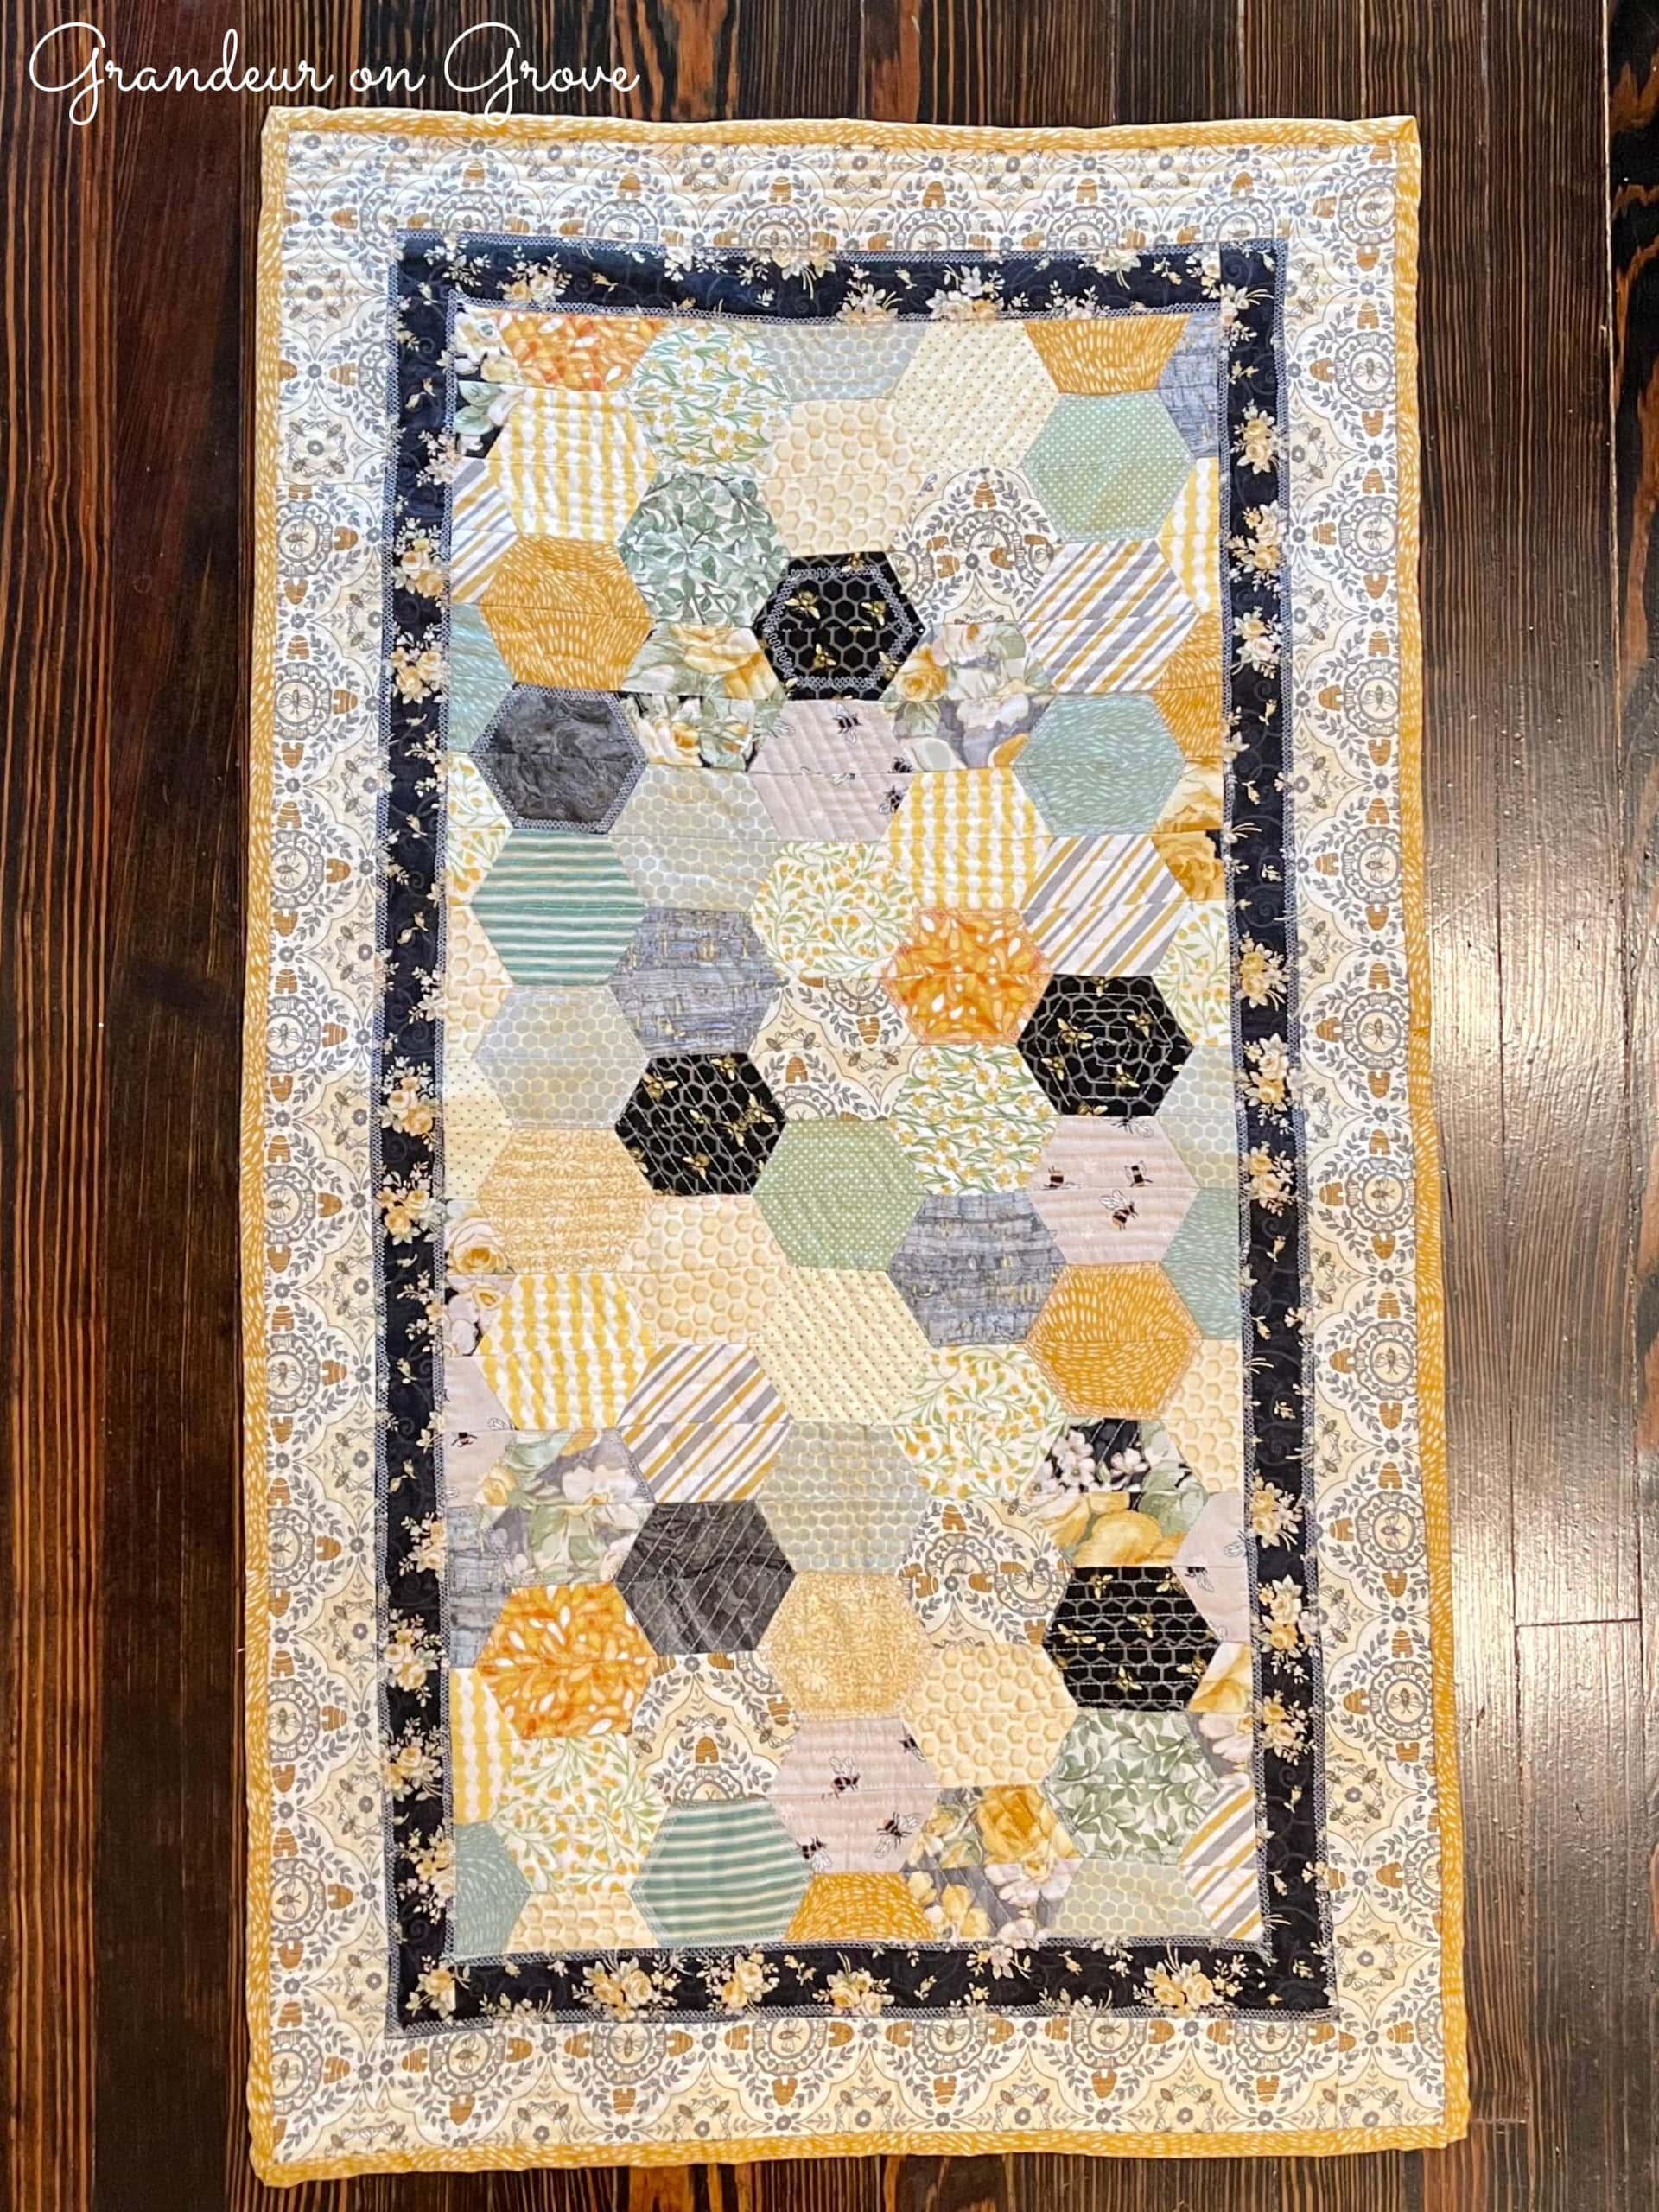
Next, I squared off the hexagons and added the black and outer borders. When it came to quilting the layers together, I decided to try some new quilting techniques by dispersing six different quilting techniques amongst the hexagons. Some hexagons have spirals, some diagonals; others have stylized borders or stripes. The result was a “honeycomb” comprised of many different textures, some of which you can see below.
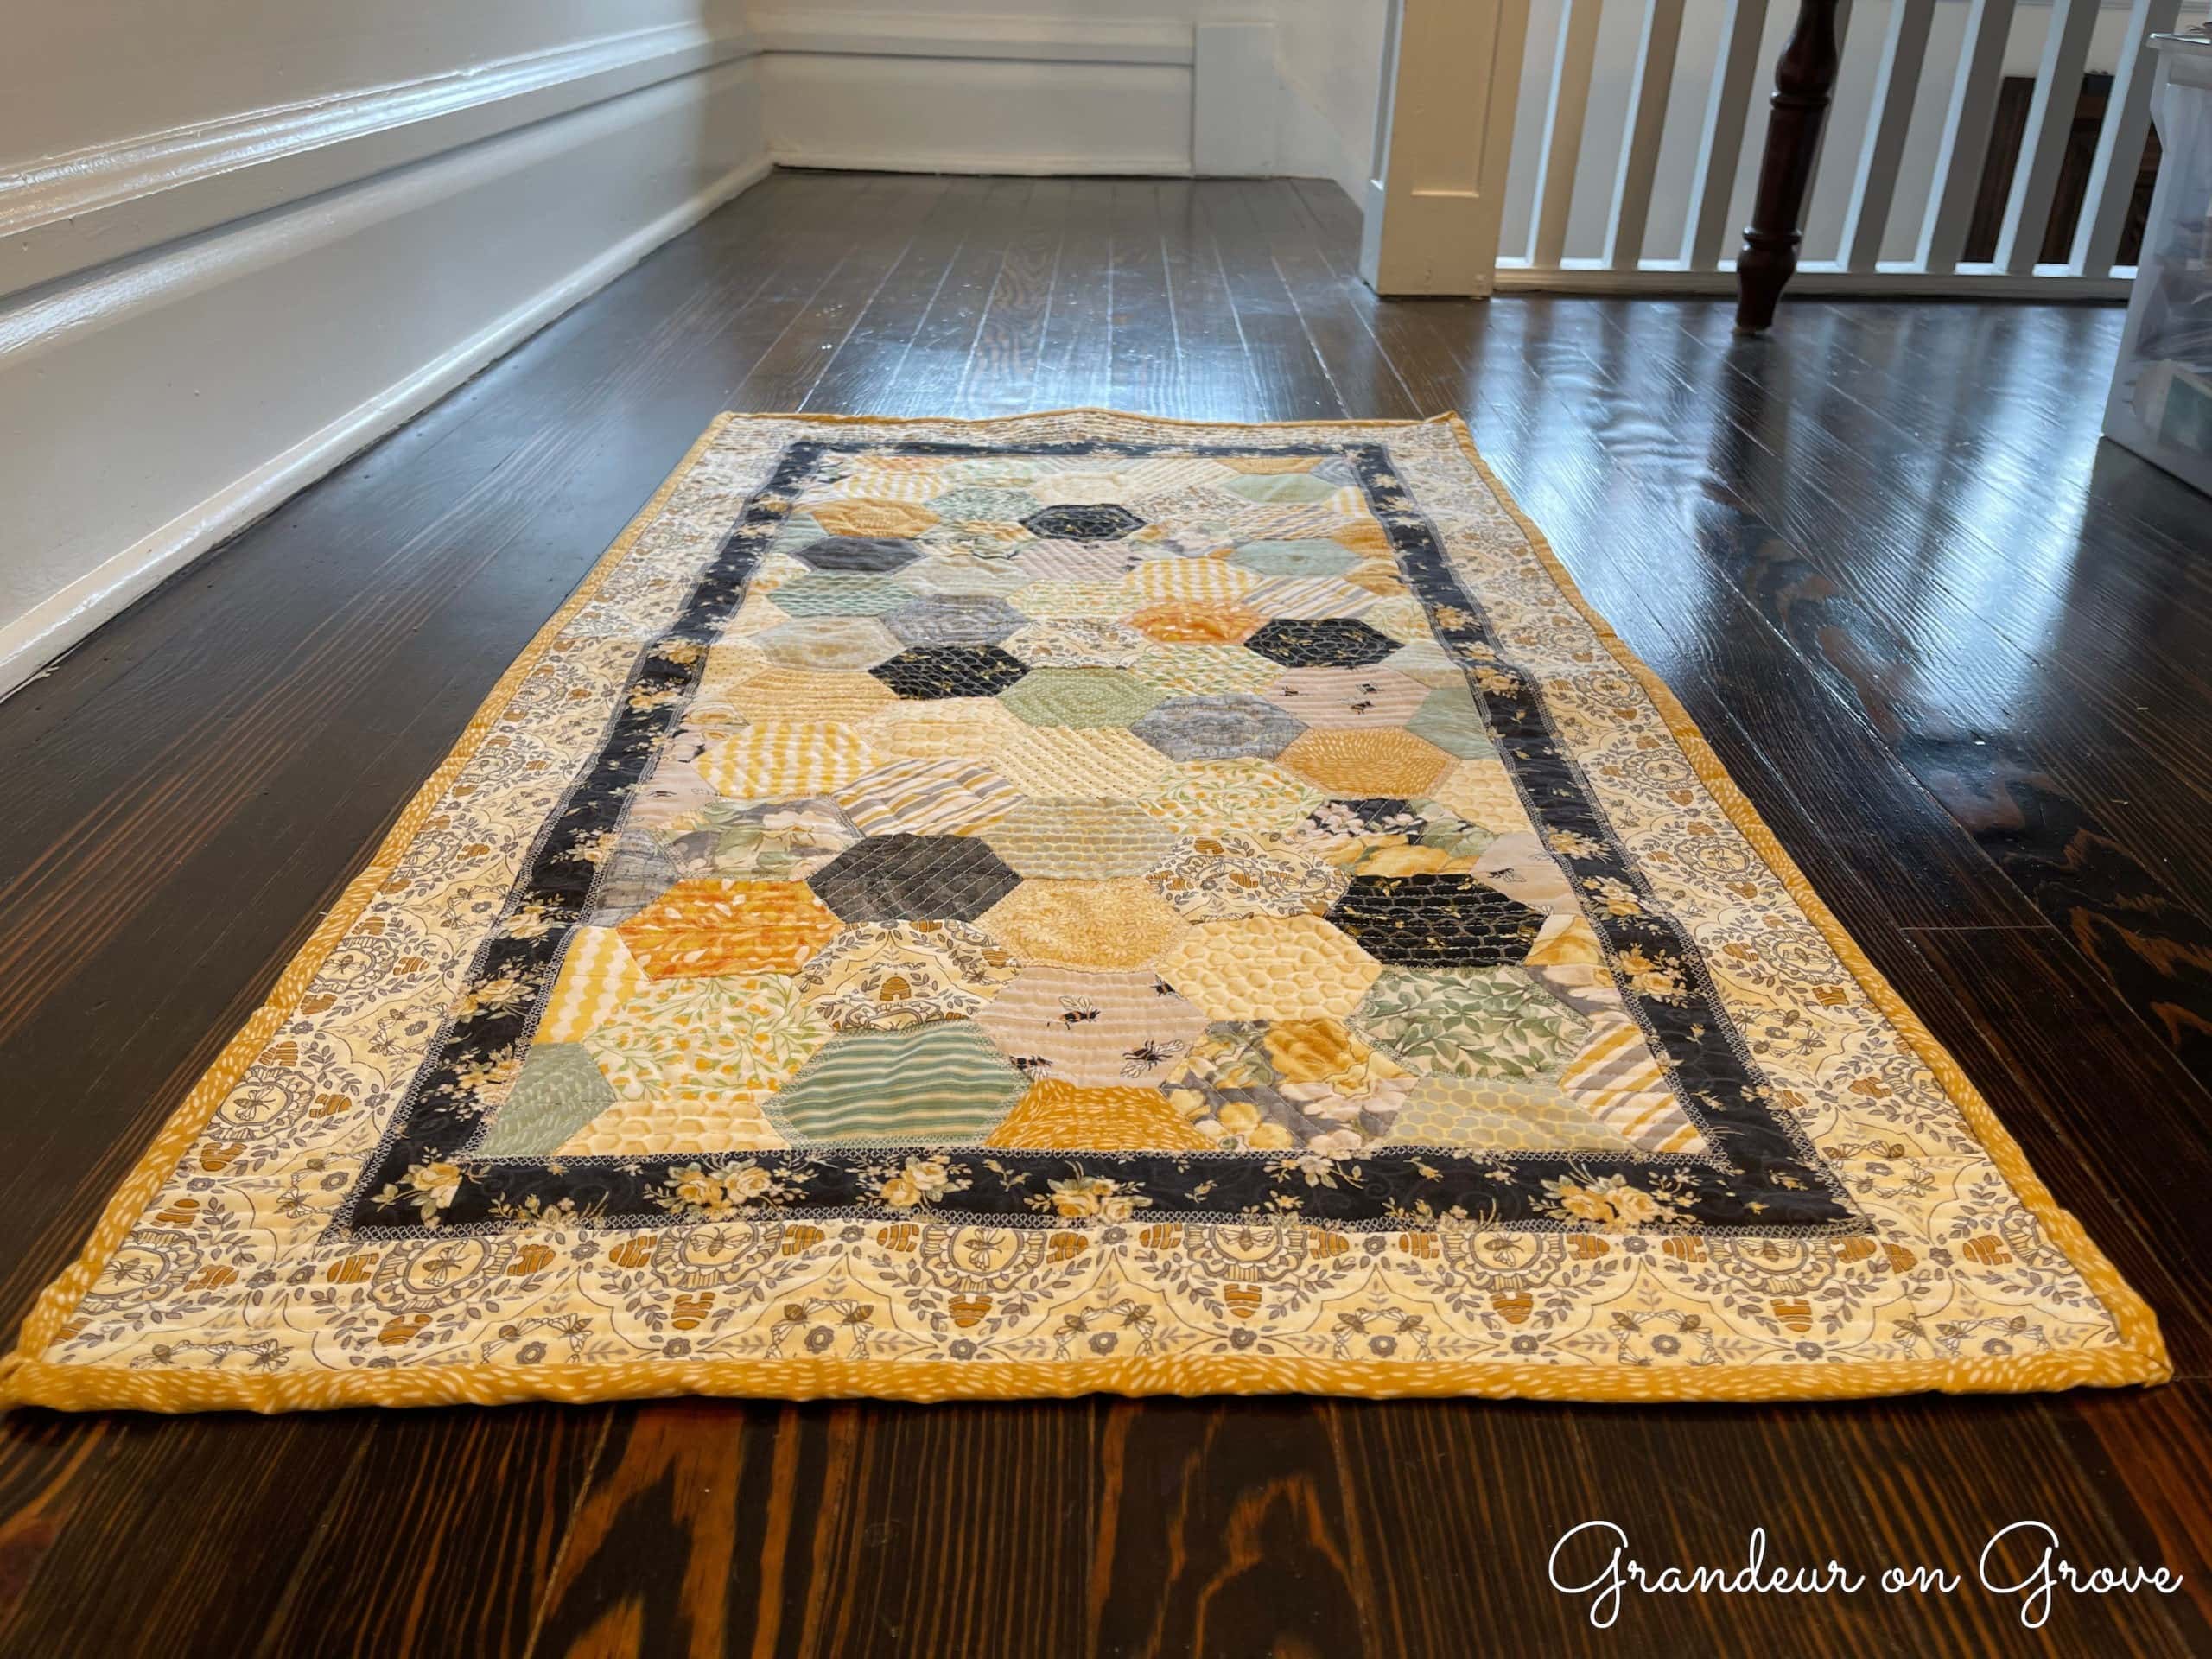
Lastly, I added a yellow and grey floral backing–you know, to help the bees make the honey ;)–and yellow binding to finish the wall hanging.
In a future article, I’ll show you my diamond, starburst, twin-sized bed quilt. The top is completed, but I’m waiting for the opportunity to use my mom’s long-arm sewing machine to finish the quilt. I’ll keep you posted. Meanwhile, you can check out my other sewing projects.
That leaves triangles and curves as future challenges. Stay tuned!